Finally, bought a Raspberry Pi 2 (Model B) Starter Kit from Amazon.in for Rs.5695/-. Had to see what all the hype is about. Following are the components that were packed in the box.
Raspberry Pi 2 with 1 GB RAM;
ProtoPi B+/2 prototyping kit;
Multicomp Raspberry Pi 2 enclosure - Black,
Breadboard - 400 pts, white;
Breadboard jumper wire pack - 75 pack;
Electronic Components:
5x RED 5mm LED; 5x GREEN 5mm LED;
10x Resistor - 10k, 1/4W; 10x Resistor - 560 ohm, 1/4W;
1x Capacitor - 220 uF, 25V;
2x Pushbutton;
1x Male breakable header strip,
8 GB class 10 microSD card with NOOBS pre-installed;
Miniature 802.11n Wi-fi adapter;
HDMI to HDMI cable;
5V, 2A USB Power adapter with micro USB cable
The mother board looks like this. The first trick is fitting
it into the black box. You need to slide it at one end and push the holes on
the other end of the board to the small sticks in the box to lock it. Once you
push it in, it is not easy to remove it unless you have thin fingers or long
nails. To remove the board from the box, you need to push the short sticks to
the side to unlock the board and then lift it on one side. And once you put the
top cover, it is very difficult to open it. That is my experience with the kit
I got.

Now, as instructed in the manual, I pushed the 8GB memory
card at the top end behind the board. Connected the wireless mouse and
keyboard. Connected the HDMI chord to my 49 inches Samsung TV at home. Then, connected
the white power chord.

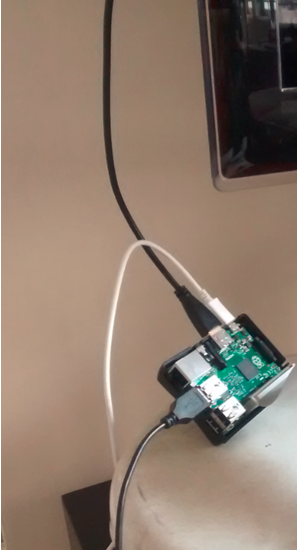
But the HDMI chord was so short that the whole board was
hanging from the wire connected to the TV. And the power connector was also too
short to reach the power point. Fortunately, it supported a USB connection. So,
I connected it to my laptop.
As soon as the white power chord was connected to my laptop,
red and green light on the Raspberry Pi (RPi) board glows. Now, I switched on
my TV, but the screen showed ‘No signal’. When I checked the source settings of
the TV, I see that it has detected Raspberry, but still, it could not connect
to it. Searched the internet and found out that I need to reinstall the latest NOOBs
on the memory card. So, I unplugged the setup and took the memory card out of
Raspberry Pi. Put it into my laptop, and extracted the latest NOOBs files on
it. And then put the memory card back into RPi. But no luck, the TV was still not
connecting. Again, searched the internet and learnt that I need to modify /boot/config.txt
file. It contains some HDMI properties that needs to be uncommented. What I
learnt here, is that, I cannot access config.txt by putting the memory card
into my laptop. I can access it only if I login to the RPi OS which is not yet
installed. Now, this was a deadlock for me. Disappointed.
Then, I took the RPi to my office and connected it to a
compatible smaller desktop monitor which was also Samsung. It booted and
installed the OS.


Now, I logged into the RPi with default credentials (user: pi,
password: raspberry). By default you will be in /home/pi folder. I opened the
file /boot/config.txt and uncommented the following lines:
hdmi_safe=1
hdmi_group=1
hdmi_mode=1
OS installation had already uncommented the other required
lines:
hdmi_force_hotplug=1
config_hdmi_boost=4
I saved the file. Shutdown the RPi using the command ‘sudo
shutdown -h now’ and took it back to my home and now it connected successfully
to my home TV. Am happy now :-) .
No comments:
Post a Comment