After getting the Raspberry Pi working with my Samsung TV at
home, it was time to try lighting up an LED. As part of the Raspberry Pi kit,
following items were given: Resistors, LEDs, switches, capacitor.

I need just the LED and a resistor. But the package had 10K
and 180 ohms resistors and I need 220-270 ohms resistor for the power supply in
India. So, I had to buy a separate one for it.
The
mother board does not show the pin numbers. It provides a separate piece which contains
the pin numbers which can be fixed on the white bread board.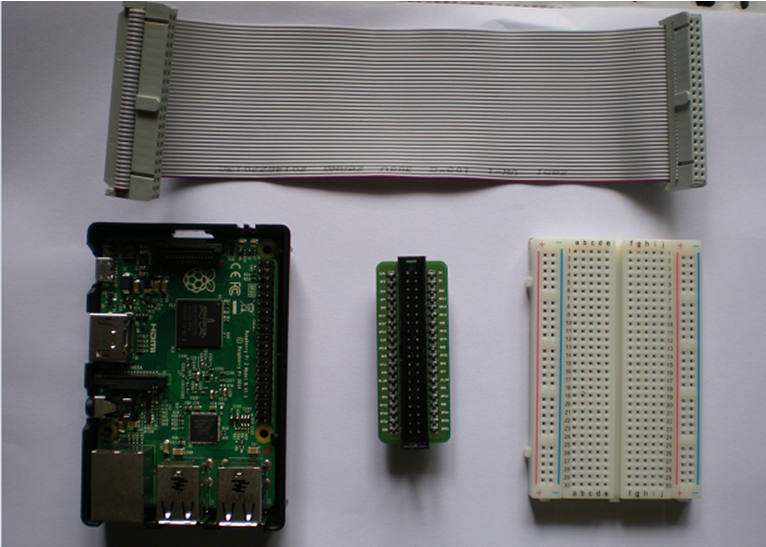
Connect the pins to the bread board. I also took the
printout of a description of the pins for reference.

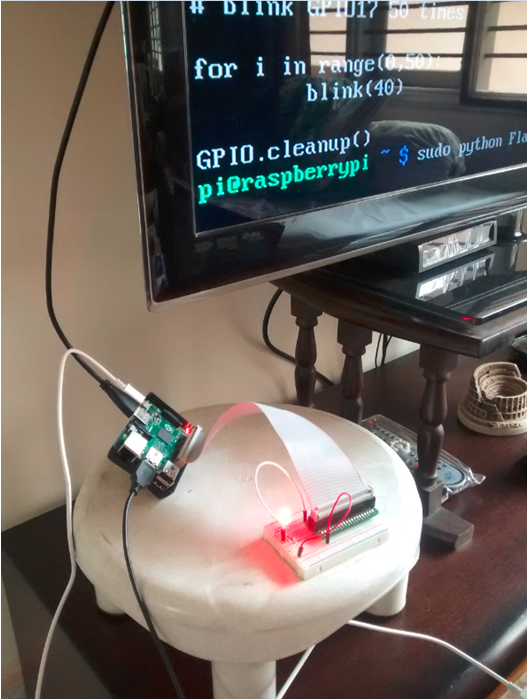
And then connected the LED, resistor to pin 40 and ground. I
connected a red wire from pin 40 to the resistor. The other end of the resistor
is next to the long side of the LED. And the short end of LED is connected to
the ground.

While setting this up, I realized that this bread board
is really small. Wish it was bigger. Anyway, powered up the RPi and added a
python program in /home/pi called FlashLED.py which contains the following
code.
According to the image above, LED is attached to pin 40. So, the python program uses pin 40 as the output.
import RPi.GPIO as GPIO
import time
# blinking function
def blink(pin):


GPIO.output(pin,GPIO.HIGH)


time.sleep(2)


GPIO.output(pin,GPIO.LOW)


time.sleep(2)

        return


# to use Raspberry Pi board pin numbers

GPIO.setmode(GPIO.BOARD)

# set up GPIO output channel

GPIO.setup(40, GPIO.OUT)


# blink 50 times

for i in range(0,50):

        blink(40)


GPIO.cleanup()
Now run the python file:
sudo python FlashLED.py
And Voila, the LED glowed. It blinked for 50 times.